Make Your Own Model Rocket! : 11 Steps (with Pictures ...
Not more rolling...
Here's where you'll need to break out the compass.After I did some calculations, I found that a cone approximately the height of 4 inches could be achieved by using 4" radius circle.Complicated, isn't it?
Use the compass to mark out the 4" radius circle onto another manila folder.Cut it out, then fold the circle in half.Cutting along the fold, you'll be left with two semicircles.Cut a small notch in the middle of the straight side of each semicircle.These notches help to form the sharp point of the cone.
Then, take one of the manila semicircles and line the straight side along the edge of your work surface, with the curved side away from you.Hold a finger point in the middle of the straight side to act as an anchor point, then use your other hand to roll one side of the semicircle on the edge of your work surface.The piece should spin around your finger like a wheel. Sorry if the pictures aren't clear!

The semicircle should begin to look like it's curving into a cone shape.You can begin making the cone tighter, working it until it matches the diameter of the body tube.Use clothespins to hold the cone in place while you glue the flap down.
Do the same to the other semicircle.Instead of forming it to the body tube, you can form it to the first cone by forcefully pushing the second cone into the first (the first cone should be properly glued and dried).Now that the inner cone is formed, you can pull it out, add a little glue inside the first cone, and then reinsert the piece, again pushing forcefully.After letting the finished two-layer piece dry, I used the X-acto knife to trim off excess material and clean it up.
Now you'll need to form the conduit tube that allows the cone to insert into the body tube.Cut down the length of a toilet paper tube, then cut along the curve of the tube to make a curved strip of cardboard.I cut mine too long and ended up needing to saw down the tube afterwards.You only need the strip to be about 1 inch thick.Again (with more rolling), use the edge of your work surface to work down the curve of the cardboard until it can fit inside the body tube snugly.You may need to trim off some material if the strip is too long.Coat the inner side with glue, then reinsert the cardboard into the body tube.You can use a pencil or other slim object to tighten the piece inside of the body tube.After it dries, you should be able to remove the piece from the body tube.Now you'll need to make the second part to the conduit.Cut off a piece of the toilet paper tube so that it fits with a small gap inside the first conduit tube.This will allow the piece to bend to the inside of the cone.Insert it into the first conduit piece, then push it into the cone to see how far up the piece has to go in order to make contact with the inside of the cone.Mark its position with a pencil.Then, apply glue and reinsert it, forming the finished conduit tube.
Finally, coat the inner piece to the conduit tube with glue and insert it into the cone, pressing firmly.Look down the length of the piece as you rotate it so you can true the angle of the cone.Let it dry, and then you're done with the nose cone!
-
Latest
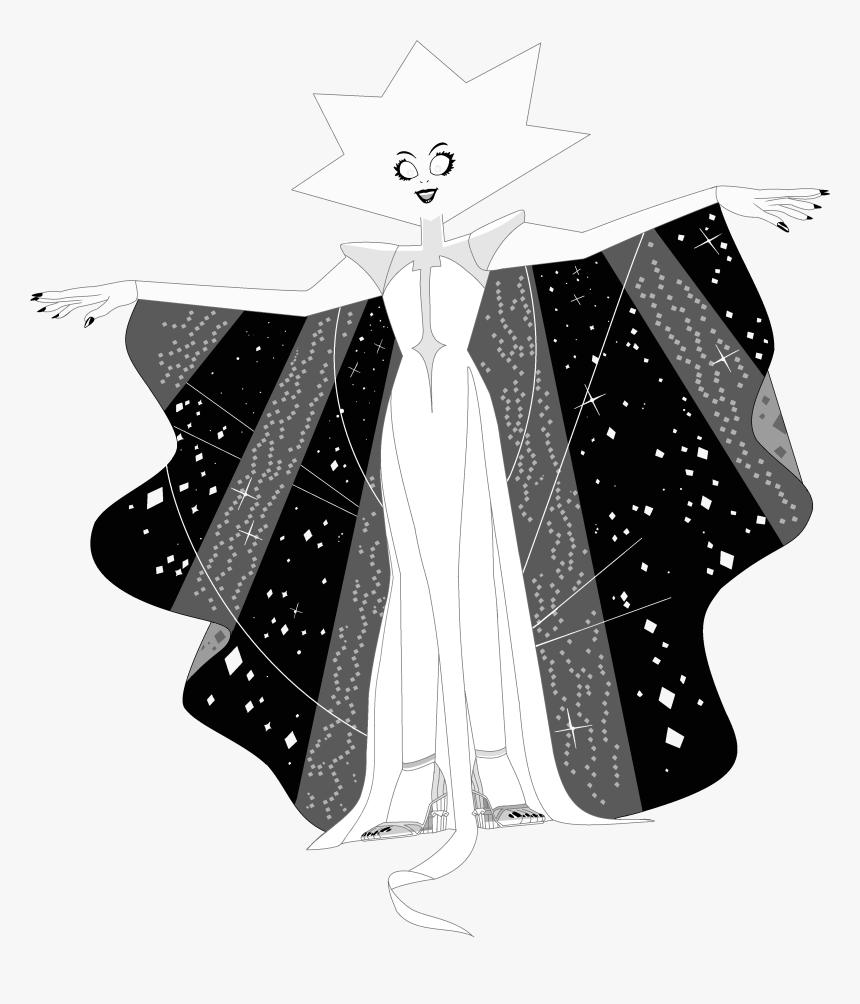 White Diamond | Steven Universe Wiki | Fandom
This article is about the character. You may be looking for the soundtrack.“Now the impurities you've encouraged in them are gone! Now they are brilliant; now, they are perfect; now, they are me...
-
Next
 Lion/History | Steven Universe Wiki | Fandom
Main article: LionLion is the pet of the Crystal Gems who followed them home from the desert after one of Steven's first missions.Pre-SeriesLion was once a normal wild lion, presumably owned by Rose Q...
Popular Articles
- Rocket Power (TV Series 1999–2004) - Rocket Power (TV Series ...
- technique - What is the definition of 'playing in the pocket ...
- "Pocket rockets," in poker Crossword Clue Answers, Crossword ...
- 5 Sex Toys Every Man Should Own, Use & Use Again - LA Weekly
- Pocket Holsters: 11 Options For Easy Everyday Carry (2021 ...
- What is Elton John's most successful song? (Celebrity Exclusive)