Water Bottle Rockets - Activity - TeachEngineering
Summary
What makes rockets fly straight? What makes rockets fly far? Why use water to make the rocket fly? Students are challenged to design and build rockets from two-liter plastic soda bottles that travel as far and straight as possible or stay aloft as long as possible. Guided by the steps of the engineering design process, students first watch a video that shows rocket launch failures and then participate in three teacher-led mini-activities with demos to explore key rocket design concepts: center of drag, center of mass, and momentum and impulse. Then the class tests four combinations of propellants (air, water) and center of mass (weight added fore or aft) to see how these variables affect rocket distance and hang time. From what they learn, student pairs create their own rockets from plastic bottles with cardboard fins and their choices of propellant and center of mass placement, which they test and refine before a culminating engineering field day competition. Teams design for maximum distance or hang time; adding a parachute is optional. Students learn that engineering failures during design and testing are just steps along the way to success.This engineering curriculum aligns to Next Generation Science Standards (NGSS).Engineering Connection
Mechanical, aerospace and aeronautical engineers design aircraft such as airplanes, helicopters and space shuttles that must fly reliably, safely and predictably. This requires an understanding of the fundamental laws of physics and strong backgrounds in basic engineering disciplines (dynamics, fluid mechanics, materials). Materials engineers develop materials that can withstand environmental extremes associated with flight. Like engineers, students follow the steps of the engineering design process and apply the fundamental concepts of physics principles to design, test and redesign water bottle rockets that fly as intended.
Learning Objectives
After this activity, students should be able to:
Design and build a water bottle rocket that flies straight and in the desired direction.Explain center of drag, and center of mass, and draw their relationships to each other for a straight-flying rocket.Explain why water is more effective than air for propelling bottle rockets.Explain the steps in the design process as they created their rockets, highlighting successes and failures, and suggesting further improvements.Educational StandardsEach TeachEngineering lesson or activity is correlated to one or more K-12 science,technology, engineering or math (STEM) educational standards.
All 100,000+ K-12 STEM standards covered in TeachEngineering are collected, maintained and packaged by the Achievement Standards Network (ASN),a project of D2L (www.achievementstandards.org).
In the ASN, standards are hierarchically structured: first by source; e.g., by state; within source by type; e.g., science or mathematics;within type by subtype, then by grade, etc.
Each TeachEngineering lesson or activity is correlated to one or more K-12 science,technology, engineering or math (STEM) educational standards.
All 100,000+ K-12 STEM standards covered in TeachEngineering are collected, maintained and packaged by the Achievement Standards Network (ASN),a project of D2L (www.achievementstandards.org).
In the ASN, standards are hierarchically structured: first by source; e.g., by state; within source by type; e.g., science or mathematics;within type by subtype, then by grade, etc.
MS-ETS1-2.Evaluate competing design solutions using a systematic process to determine how well they meet the criteria and constraints of the problem.(Grades 6 - 8)
Do you agree with this alignment?Thanks for your feedback!
Click to view other curriculum aligned to this Performance ExpectationThis activity focuses on the followingThree Dimensional Learning aspects of NGSS:Science & Engineering PracticesDisciplinary Core IdeasCrosscutting ConceptsEvaluate competing design solutions based on jointly developed and agreed-upon design criteria.Alignment agreement:Thanks for your feedback!
There are systematic processes for evaluating solutions with respect to how well they meet the criteria and constraints of a problem.Alignment agreement:Thanks for your feedback!
MS-ETS1-4.Develop a model to generate data for iterative testing and modification of a proposed object, tool, or process such that an optimal design can be achieved.(Grades 6 - 8)
Do you agree with this alignment?Thanks for your feedback!
Click to view other curriculum aligned to this Performance ExpectationThis activity focuses on the followingThree Dimensional Learning aspects of NGSS:Science & Engineering PracticesDisciplinary Core IdeasCrosscutting ConceptsDevelop a model to generate data to test ideas about designed systems, including those representing inputs and outputs.Alignment agreement:Thanks for your feedback!
Models of all kinds are important for testing solutions.Alignment agreement:Thanks for your feedback!
The iterative process of testing the most promising solutions and modifying what is proposed on the basis of the test results leads to greater refinement and ultimately to an optimal solution.Alignment agreement:Thanks for your feedback!
MS-PS2-2.Plan an investigation to provide evidence that the change in an object's motion depends on the sum of the forces on the object and the mass of the object.(Grades 6 - 8)
Do you agree with this alignment?Thanks for your feedback!
Click to view other curriculum aligned to this Performance ExpectationThis activity focuses on the followingThree Dimensional Learning aspects of NGSS:Science & Engineering PracticesDisciplinary Core IdeasCrosscutting ConceptsPlan an investigation individually and collaboratively, and in the design: identify independent and dependent variables and controls, what tools are needed to do the gathering, how measurements will be recorded, and how many data are needed to support a claim.Alignment agreement:Thanks for your feedback!
Science knowledge is based upon logical and conceptual connections between evidence and explanations.Alignment agreement:Thanks for your feedback!
The motion of an object is determined by the sum of the forces acting on it; if the total force on the object is not zero, its motion will change. The greater the mass of the object, the greater the force needed to achieve the same change in motion. For any given object, a larger force causes a larger change in motion.Alignment agreement:Thanks for your feedback!
All positions of objects and the directions of forces and motions must be described in an arbitrarily chosen reference frame and arbitrarily chosen units of size. In order to share information with other people, these choices must also be shared.Alignment agreement:Thanks for your feedback!
Explanations of stability and change in natural or designed systems can be constructed by examining the changes over time and forces at different scales.Alignment agreement:Thanks for your feedback!
View aligned curriculum
Do you agree with this alignment?Thanks for your feedback!
Students will develop an understanding of engineering design.(Grades K - 12)More DetailsView aligned curriculum
Do you agree with this alignment?Thanks for your feedback!
Students will develop an understanding of the role of troubleshooting, research and development, invention and innovation, and experimentation in problem solving.(Grades K - 12)More DetailsView aligned curriculum
Do you agree with this alignment?Thanks for your feedback!
View aligned curriculum
Do you agree with this alignment?Thanks for your feedback!
Plan an investigation to provide evidence that the change in an object's motion depends on the sum of the forces on the object and the mass of the object.(Grades 6 - 8)More DetailsView aligned curriculum
Do you agree with this alignment?Thanks for your feedback!
Develop a model to generate data for iterative testing and modification of a proposed object, tool, or process such that an optimal design can be achieved.(Grades 6 - 8)More DetailsView aligned curriculum
Do you agree with this alignment?Thanks for your feedback!
Materials List
To share with the entire class:
equipment and Internet access to show the class an online video(optional) awards for winning team(s), such as treats or privilegesMini-activity materials to be used with the entire class:
wind vane apparatus (built by teacher in advance for Center of Drag Mini-Activity #1)2 identical pieces of thin corrugated cardboard stock, each ~2 x 5-inches in sizetwo 6-inch lengths of stiff steel wire, such as landscape flag stock; the wire must be thinner than the cardboard thickness12-inch length of 2 x 4 piece of wooddrill and a small drill bit that is the same diameter as the stiff steel wireelectric fanweighted dowel (built by teacher in advance for Center of Mass Mini-Activity #2)3-foot length of ½-1-inch diameter (wooden) dowel/bar or (light aluminum stock) rod, etc.4 rolls of penniesduct tapevarious classroom objects to test the center of mass, such as rulers, yardsticks, pencils, erasers, irregularly shaped objects, etc.; one per student pair(optional) a ruler with a roll of pennies to be taped at various positions2 chairs with wheels (for Momentum and Impulse Mini-Activity #3); rolling office chairs work wellwater bottle rocket launcher, such as the Aquapod Bottle Launcherbicycle pump with pressure gauge, needed for the bottle launcher; note: do not use mechanically compressed air with launchers built with PVC pipe!clear packaging tape, at least 2 rollsduct tape, at least 2 rolls5-7 quarters; other coins may work, too(optional) various parachute materials (such as plastic bags) and line materials (such as twine, thread, string, 3/16-inch curling ribbon)stopwatchtape measuresafety glasses, at least two pairEach group needs:
two 2-liter soda bottles; one bottle serves as the pressure vessel for the rocket; (optional) the other as a nose cone for a parachute; for best fit in the rocket launcher, use Pepsi and Coca-Cola product bottles2 manila folders or cardboard, from which to construct finsduct or packing tape1 large plastic garbage bag, to be used for the parachutestring, to attach the plastic bag to the rocketscissorsmarker that writes on plasticweight to adjust center of mass (5-7 quarters, clay, balled-up paper, etc.)paper (or science notebooks) and pencils for notes, predictions, hypotheses, explanations, sketchesInitial Design Worksheet, one per studentRevised Design Worksheet, one per studentWater Rockets Distance Competition Rules or Water Rockets Hang Time Competition Rules, one per groupWorksheets and Attachments
Visit [www.teachengineering.org/activities/view/ucd_bottlerockets_activity1] to print or download.More Curriculum Like This
Through the continuing storyline of the Rockets unit, this lesson looks more closely at Spaceman Rohan, Spacewoman Tess, their daughter Maya, and their challenges with getting to space, setting up satellites, and exploring uncharted waters via a canoe. Students are introduced to the ideas of thrust,...
Students acquire a basic understanding of the science and engineering of space travel as well as a brief history of space exploration. They learn about the scientists and engineers who made space travel possible and briefly examine some famous space missions.
Students explore motion, rockets and rocket motion while assisting Spacewoman Tess, Spaceman Rohan and Maya in their explorations. First they learn some basic facts about vehicles, rockets and why we use them. Then, they discover that the motion of all objects—including the flight of a rocket and mo...
The purpose of this lesson is to teach students how a spacecraft gets from the surface of the Earth to Mars. Students first investigate rockets and how they are able to get us into space. Finally, the nature of an orbit is discussed as well as how orbits enable us to get from planet to planet — spec...
Pre-Req Knowledge
A basic understanding of energy and energy transfer; forces, mass and Newton’s laws of motion, velocity and acceleration; drag (air resistance); and levers.
Introduction/Motivation
Who wants to launch a rocket? (Wait for student responses by a show of hands or verbal response).
Would you rather have a high-flying, straight-shooting rocket or a rocket that flies end-over-end, willy-nilly, and crashes to the ground right after you launch it? NASA certainly doesn’t want its rockets coming down before they are supposed to—but sometimes they do.
Let’s watch. (Show the class a 5:40-minute video, Numerous US Launch Failures, about rocket disasters at https://www.youtube.com/watch?v=CEFNjL86y9c. You need not play the entire video.)
What did you notice? Did you see how some of those rockets flew crooked and out of control before they exploded? In human history, it took some time and lots of testing to really understand how rockets fly.
Over the next few days, we’re going to build some simple rockets using two-liter soda bottles—and just like NASA engineers—we want them to fly straight and far.
Who likes to do things right the first time? (Watch student responses.) Most people do.
Some of the first rockets that we will design and build are going to look like “failures,” but they are not failures. They are just steps along the way to success. That’s the great thing about engineering. Mistakes are just part of the learning process and we are going to learn about this process, which is called the engineering design process. We are going to make rockets, test them, watch if they fail, learn what we can, and redesign them. We are going to make lots of “mistakes” and that’s part of the fun. The only real mistake is not learning from them!
Procedure
Overview
Students are challenged to use two-liter plastic soda bottles to build water bottle rockets that travel the furthest distance or can hang in the air the longest (hang time). They follow the steps of the engineering design process as they create rockets using plastic bottles, paper or plastic sheet material for fins, and tape. During the design, construction and redesign phases, students test their rockets as many times as needed to refine the rockets so they can travel the farthest distance, or stay in the air the longest.
During competition, student pairs choose the water amount and launch angle—for distance or height (hang time). For the competition, the rockets are launched and judged once. Hang times are measured from the time the rocket is released until the first part (possibly detached) of the rocket touches ground. Distances are measured from the launcher to the closest part (possibly detached) of the fully at rest rocket. Criteria to break distance and time ties are (in order): construction quality, rocket weight (lighter rocket is favored), and style. See more details in the Water Rockets Distance Competition Rules and Water Rockets Hang Time Competition Rules.
Background
In this activity, students learn about the basics of aerodynamics and flight by designing, building and launching water bottle rockets (without/with parachutes) with the challenge to compete to see which design flies the farthest distance or remains aloft the longest amount of time. This activity is divided into multiple days and includes three mini-activities to teach the three main concepts necessary to design water bottle rockets: center of drag, center of mass, and momentum and impulse. The principal focus of the activity is two-fold:
What makes a rocket fly straight? via exploration of the center of mass, center of drag and the relationship between themWhat makes a rocket fly far? by exploring the question, “Why use water to make the rocket fly?”Through the mini-activity preparatory work and observations and their own design and testing, students gain firsthand experience with momentum and impulse, and reinforce their understanding of Newton’s laws, forces, energy and related concepts. Expect rocket designs to be nearly identical for distance and hang time, except for hang time rockets that add parachutes.
The key to water bottle rocket flight stability is the physical separation, along the length of the rocket, of the center of drag (COD) and the center of mass (COM). The COD is the point at which a pivot is placed on a wind vane in order to prevent it from turning one way or the other. A normally functioning wind vane does NOT have its pivot point at the center of drag, which is why it indicates the wind direction. Lever action pushes back the side on the vane that experiences more wind drag with greater force than the side with less drag. The COM is the point at which an object balances on a finger and it is also the point about which the object rotates if tossed end-over-end. Notice that both the COD and the COM are the balance point of forces—the force of air resistance and the force of gravity, respectively.
Clearly, a stable flying rocket has its center of drag behind its pivot point, keeping the rocket tail toward the back (think feathers on an arrow). The problem is, how do we establish the pivot point if we cannot attach it to a fixed object (such as a wind vane pivot attached to a roof)? This is when the COM becomes important. In a free-flying object, the COM acts as the natural point of rotation and is, therefore, a pivot point. Placing the COM towards the front (by adding weight to the nose) and by placing the COD toward the back (by adding fins to the tail) creates the necessary separation.
Once a stable rocket is built, the next concern is how to best generate thrust to make the rocket fly far. Energy is stored in the pressure vessel and thrust is generated upon rocket launch. According to the law of conservation of momentum, the momentum of an independent system does not change. The rocket + propellant are the independent system. Initially, since the rocket has no velocity, its momentum is zero. After launch, the total momentum of the rocket and the expelled propellant must still be zero. Momentum is defined as: momentum = mass x velocity. As the propellant is expelled with some velocity, its momentum is no longer zero. Net-zero momentum of the system, however, is maintained by the rocket flying off in the opposite direction with equal and opposite momentum. Since the greater the mass of the propellant and the lighter the mass of the rocket, the greater the velocity of rocket will be. Water, being much denser than air, generates greater thrust in the rocket than with the same rocket filled with air alone.
Before the Activity
Gather materials and make copies of the Initial Design Worksheet and Revised Design Worksheet.Also make copies of the Water Rockets Distance Competition Rules and Water Rockets Hang Time Competition Rules; before printing, modify these rules as necessary to match your final competition plans.Follow the instructions below to build a small wind vane apparatus for the Center of Drag Mini-Activity #1 (see Figure 1) and a weighted dowel for the Center of Mass Mini-Activity #2 (see Figure 2).(optional) As an additional item for Mini-Activity #2, consider making a smaller weighted object that can be thrown into the air for demonstration purposes, such as a ruler with a roll of pennies that can be taped at various positions.Obtain (borrow) two rolling chairs for the Momentum and Impulse Mini-Activity #3.Follow the instructions below to build one minimal rocket—a two-liter bottle with three fins—that can be variably weighted for use in the rocket trials (see the With the Students: Day 2 section).On Day 1, be ready to show the class an online video as part of the Introduction/Motivation content.Teacher Instructions: Build a Wind Vane Apparatus for the Center of Drag Mini-Activity #1
Obtain two identical pieces of thin corrugated cardboard stock, each ~2 x 5-inches in size.Mark one piece with a vertical line at the center of drag of the cardboard, and mark the other piece with a vertical line 1 inch from the edge (offset from center of drag). See Figure 1.Into each piece of cardboard stock, push a ~6-inch piece of stiff steel wire between the cardboard layers without pushing it all the way through.Into a 12-inch length of 2 x 4 wood, drill one hole large enough to insert the pivot wires that is located 1 inch from the edge of the block. Drill a second hole that is 2½ inches from the other edge of the block. See Figure 1.Insert the cardboard piece (with wire at the center of drag) into the hole made 2½ inches away from the edge. Place the other cardboard piece (with wire offset from center of drag) in the hole that is 1 inch from the edge of the wood block.Make sure the two vanes (cardboard pieces) do not interfere with each another when they spin.For the activity, place the wooden block with vanes in front of an electric fan.Figure 1. Assembly of the wind vane apparatus for the Center of Drag Mini-Activity #1.Copyright © 2015 Duff Harrold, RESOURCE GK-12 Program, College of Engineering, University of California Davis
Teacher Instructions: Build a Weighted Dowel for the Center of Mass Mini-Activity #2
Obtain a lightweight rod or wooden dowel that is ~½-1 inch in diameter and at least 3 feet long.Weight the rod at one end by duct taping four rolls of pennies to the rod.In taping the weights, leave about ½-1 inch of the rod extending past the coin rolls such that the rod can be balanced by using only one or two fingers, regardless of the rod orientation (heavy end up or heavy end down). See Figure 2.Figure 2. Assembly of the weighted dowel for the Center of Mass Mini-Activity #2.Copyright © 2015 Duff Harrold, RESOURCE GK-12 Program, College of Engineering, University of California Davis
Teacher Instructions: Build a Minimal Rocket to Be Variably Weighted for the Rocket Trials
Out of manila folders or cardboard, cut three fins that are all the same size and shape.Use duct or packaging tape to attach the fins to a two-liter plastic soda bottle. Evenly distribute the three fins around the bottle circumference and place the fins so they are located below the center of drag; that is, do not place the fins at the very top of the rocket. REMEMBER: The bottom of the rocket is the bottle mouth, so be sure to attach the fins to the rocket so they are not upside down when launched! (See Figure 6.)Use tape to seal the edges of the fins touching the bottle to make sure they have secure contact. If not well attached, fins can fly off the rocket during launching.With the Students: Day 1—Mini-Activities
Introduction & Pre-Assessment
Present to the class the Introduction/Motivation content, including showing an online video.Introduce the design matrix shown in Table 1 and the four basic design variables: air (A) or water (W) for the propellant, and high (H) or low (L) for the center of mass. Write the design matrix on the classroom board for students to look over. (After conducting the three mini activities, students will be informed enough to select one of the four design choices presented in the matrix to enable their rockets to fly the straightest and furthest.)Table 1. Design matrix.Copyright © 2015 Duff Harrold, RESOURCE GK-12 Program, College of Engineering, University of California Davis
Mini-Activity #1: Center of Drag
Use this mini-activity to introduce students to the concept of drag and how the placement of drag on a projectile affects its flight. Start off with a brief discussion of drag using prompts such as:Have you ever put your hand out the window of a moving car? What did you notice?” (Answer: Your hand gets pushed backwards.)What happens as the car goes faster? (Answer: Your hand gets pushed back harder.)What is pushing on your hand? (Answer: Air.)Does the air push harder if you hold your hand palm forward or palm down? (Answer: Palm forward.)Why does this happen? (Answer: Air resistance.)What’s another word for air-resistance that is used in science and engineering? (Answer: Drag.)Hold up the wind vane apparatus to show the students. Explain the concept of center of drag—the point about which wind pushes equally on both sides of the vane. In the case of a rectangle, the center of drag is right in the middle.Place the wind vane apparatus in front of a fan that is turned off. Make sure that both wind vanes are initially positioned so that the flat surface is perpendicular to the fan. Ask students the following questions:What will happen to each vane after the fan is turned on?Which vane will be the most stable? (That is, which will find a stable position and which might flutter or change positions frequently?)Which one is predictable? (That is, which one will do the SAME thing every time?)Have students record their predictions and reasoning on paper. Turn on the fan and let students observe. Expect that most students probably predicted that the centered-wire vane would be the most stable since it seems “balanced.” Yet this demonstration shows very clearly that the vane with the pivot point placed AWAY from the center of drag is the stable and predictable vane. The vane with the pivot placed AT the center of drag (that is, directly in the middle) often flutters, changing position rapidly and frequently. Ask the following guiding questions:Which pivot placement was better for vane predictability and stability?If one of these was a rocket, which would be more predictable and fly straighter into the wind?Who sees a problem? If a rocket is supposed to fly through the air, we cannot put a wire on it to make it pivot at a particular place—so where is the pivot point on a rocket?Have students write out their observations and ideas about how a rocket might be made to pivot at a particular point. The center of mass mini-activity (next) illustrates how and where a free flying object pivots.Central idea: Stability occurs when the center of drag is separated from the center of rotation. The drag will always trail the center of rotation.Mini-Activity #2: Center of Mass
Use the prompts and activities below to introduce students to the ideas of “center of mass” and stability.
Have you heard of center of mass?How is it similar to center of drag? How is it different?Divide the class into groups of two students each.Hand out various classroom objects such as rulers, yardsticks, irregularly shaped objects, one object per pair.See if the groups can find the center of mass of their objects. Hint: The center of mass is the location at which it is easiest to balance an object.Have students define, in their own words, the center of mass. For example: “The point at which an object balances on your finger.”Show students the weighted dowel apparatus and ask a volunteer to find the center of mass. (Answer: It will be far towards the weighted end.)Which way will the dowel be easier to balance on one end? With the weight towards the bottom or towards the top?Rephrase the question using the word “stable” to relate stability to the ease of balancing the dowel. Ask: Which way will make the dowel more stable while balanced on one end? (Expected answer: Most people feel that the position with the weight at the bottom will be more stable and therefore easier to balance.) Have students record on paper their initial hypotheses and explain why.Ask for volunteers to try to balance the dowel using only one or two fingers and starting with the heavy side down (see Figure 3-left). Expect it to become quickly apparent that when the center of mass is high (weight towards the top), the dowel is much easier to balance (see Figure 3-right)!Have students record this result and explain why this might be the case.Figure 3. Using a weighted dowel to experiment with balancing low center of mass (left) and high center of mass (right).
Copyright © 2015 Duff Harrold, RESOURCE GK-12 Program, College of Engineering, University of California Davis
Mini-Activity #3: Momentum and Impulse
The two-liter bottle rockets that students will create later in the activity can be launched with all air or an air/water mix (some water added to the two-liter bottle pressure vessel). This simple mini-activity illustrates why water is a more effective propellant than air.
Lead a discussion using the following questions:What will make a better propellant for our rockets: water or air? (Make this an open discussion; do not tell students which is better; many apparent good reasons exist in support of either choice.)How would you compare air and water? (For example, water is denser, thicker, heavier, etc.)Do heavy objects require more or less energy to launch into the air than light objects? (More)If we fill our rocket with water, will it require more or less energy to launch? (More)Will an empty bottle require more or less energy to pressurize to a particular pressure? (More)So, if I compare a bottle that is half full of water to a bottle with NO water (all air), will I need to pump more or less to pressurize the bottle with water to the same pressure (such as 30 psi) as the bottle with no water? (Answer: Fewer pumps are required for the bottle filled with water. Note: pressure usually has units of pounds per square inch, but it can also have units of energy per volume [Joules per cubic inch]. If thought about as an “energy density,” it is clear that for a given pressure [psi], a bottle with half the air volume has half the energy content.)A bottle filled with water contains less energy AND is much heavier than a bottle filled with air—so why are they called water bottle rockets? Why would people fill them with water? (For now, leave these as open-ended, unanswered questions.)Conduct a demonstration as described below:In an open area of the classroom place two rolling chairs.Ask for two student volunteers who are approximately the same weight.Have the students sit in the chairs facing each other with their feet are off the ground so that the chairs are free to roll (see Figure 4).Figure 4. Pushing chairs of equal mass.
Copyright © 2015 Sara Pace, RESOURCE GK-12 Program, College of Engineering, University of California Davis; using graphics from Pixabay (blue office chair and line drawing of sitting woman, both CC0 public domain) https://pixabay.com/en/office-chair-blue-chair-colour-147556/ https://pixabay.com/en/girl-sitting-woman-relaxing-person-148215/
Copyright © 2015 Sara Pace, RESOURCE GK-12 Program, College of Engineering, University of California Davis; using graphics from Pixabay (blue office chair and line drawing of sitting woman, both CC0 public domain) https://pixabay.com/en/office-chair-blue-chair-colour-147556/ https://pixabay.com/en/girl-sitting-woman-relaxing-person-148215/
With the Students: Day 2—Rocket Trials
After groups have filled out the Revised Design Worksheet and made sketches of their rocket designs, conduct rocket trials to test the four different design ideas (Table 1). Conduct the rocket trials as a class demo using the two-liter bottle rocket created by the teacher in advance. The trials are the testing step of the engineering design process, so expect students to make observations and record the test results.
Adjust the rocket for the propellant (water or air inside the bottle) and the center of mass location (taped coins) to fit the four test designs: air with high center of mass (AH), air with low center of mass (AL), water with high center of mass (WH), and water with low center of mass (WL).
For the air-only rocket, no water is put in the pressure vessel (two-liter bottle).For the low center of mass rocket, tape 5-7 quarters to the rear section of the rocket (Figure 6-left)For the high center of mass rocket, tape 5-7 quarters to the top of the rocket (Figure 6-right).Once testing is complete, students can answer the sixth question on the worksheet—to identify which tested rocket design was the best, which informs them on how to design their own water bottle rockets.Figure 6. Water bottle rocket with low (left) and high (right) center of mass.
Copyright © 2015 Sara Pace, RESOURCE GK-12 Program, College of Engineering, University of California Davis
With the Students: Days 3-4---Student-Created Rockets & Competition
Students finalize their water bottle rocket designs with their partners, then build and test their rockets in preparation for a class competition. Make available the competition rules handouts so students are clear on the project constraints.
Design: Direct the groups to revise their rocket designs as necessary to make sure they will travel as far and straight as possible. Advise them to consider what they learned from the rocket trial results (seeing four different design ideas tested) and the three mini-activities.Construction: Then each group constructs a rocket.Use a two-liter plastic bottle as the rocket body and pressure vessel.Make fins from manila folders or cardboard. As a default, suggest that each rocket have three same-size and same-shape fins (or leave this open-ended for student experimentation). Sketch out fin shapes on paper. Get teacher approval for the fin design. Make a template of the fin design. Trace it onto the manila folder three times. Cut out three fins that are exactly the same.To attach the fins to the rocket body, first use a flexible measuring tape to measure the bottle circumference where the fins will be placed. Then, if three fins are to be attached, divide the circumference by three to determine how far apart to place the fins on the rocket. For example, if the circumference is 75 cm, place the three fins 25 cm apart. Mark on the bottle the height to attach the fins and the spacing on the bottle, such as every 25 cm around the bottle circumference. Then securely attach the fins with duct or packing tape.(optional parachute construction) Use a second two-liter bottle to create a nose cone on the top of the rocket (bottom of the first two-liter bottle) that houses a parachute made of plastic bags and string. Adding a parachute is a good strategy to increase hang time. Suggestions:Make a nose cone by cutting off the top portion (cone shape) of the second bottle. This cone fits snugly on the end of the main two-liter bottle rocket but is NOT taped to the rocket bottle because it needs to come off easily during flight back down to the ground.For the parachutes, suggest that students make them any size or shape they want using the provided plastic bags and string, perhaps after some Internet research to learn more about them. Construct the parachute, attach it to the rocket bottle using string and tape, and then roll it up and place it inside the nose cone. Then fit the nose cone snugly on the top of the rocket prior to launching.Testing and Redesign: After groups finish constructing their rockets, have them wear safety goggles and use the rocket launcher to test them. Permit teams to redesign their rockets as many times as they’d like prior to the final competition. Focus them on how the center of mass and stability, center of drag, and momentum affect their design variables in order to increase the distance traveled or time in flight. Another variable to explore is fin designs to see how they affect rocket performance.Competition: Depending on the culminating competition planned for this activity, students either use meter sticks to measure the distance their rockets traveled (refer to the distance rules handout) or use a stopwatch to measure the time their rockets were in flight (refer to the hang time rules handout). Have students record their team results on a classroom data chart so as to be able to compare group results. Award any team prizes.Reflection, Sharing & Discussion: Have students describe in their own words the steps of the design process that they went through in the activity, as well as a summary of their predictions, results and conclusions—as described in the Assessment section.Vocabulary/Definitions
acceleration: The rate of change of velocity (speed and/or direction).
center of drag: The point about which an object does not rotate due to drag.
center of mass: The gravitational balance point of an object and its natural center of rotation.
drag (physics): A resistive force exerted on an object by the fluid through which it is moving.
inertia: The resistance of any object to any change in its state of motion (that is, change in velocity).
mass: The property of an object that gives it inertia.
momentum: The product of an object’s mass and velocity.
pressure: “Force per area” or “energy per volume.” P = F/A
velocity: The rate of change of an object’s position with respect to speed and direction of motion.
Assessment
Pre-Activity Assessment
Concept Baseline: Before they start the activity, have students complete the Initial Design Worksheet. The worksheet asks two short-answer, one multiple choice, and two fill-in-the-blank questions related to the activity’s learning objectives. Review students’ answers to gauge their prior knowledge about rocket fin function, center of mass for rockets, and selecting propellants.
Activity Embedded Assessment
Concept Check: After completing the three mini-activities, have students complete the Revised Design Worksheet to apply what they learned from the mini-activities. This worksheet has the same five questions as the pre-assessment worksheet, plus a post-rocket testing question. To assess student learning regarding the activity’s learning objectives, compare their initial and revised design worksheets to assess changes in comprehension of rocket design variables. The sixth question asks students to identify which tested rocket design was the best. In addition, completing the revised design worksheet informs students on how to design their water bottle rockets. Refer to the Design Worksheet Answer Key.
Post-Activity Assessment
Reflection, Sharing & Discussion: Have students describe in their own words the steps of the design process they experienced through this activity, as well as a summary of their predictions, results and conclusions. Require them to include their ideas for future rocket improvements based on the performance of their final designs and what they learned from the mini-activities. Expect students to be able to share their designs and achieved results (furthest distance traveled or longest time in flight) with the class, and be able to explain—using information they learned during the three mini-activities—why they believe their designs helped them achieve their results.
Making Sense: Have students reflect on the science concepts they explored and/or the science and engineering skills they used by completing the Making Sense Assessment.
Safety Issues
Require all students operating or near the rocket launcher to wear eye protection.Do not pressurize bottles beyond 80 psi. Well-designed rockets can fly more than 100 feet with only 40 psi. Doubling the pressure will NOT double rocket performance.Do not use motorized air-compressors due to oil-PVC incompatibility.Activity Scaling
For lower grades, focus students on building rockets that can fly straight and far. Have them experiment with the water amount to determine how much helps their rockets achieve farther distances, and with fin design adjustments to improve rocket performance.For higher grades, focus students on how they might lengthen their time in the air by adding parachutes, which increase the drag on rockets as they descend back to Earth. In addition, challenge students to explore how fin size and/or shape affect flight performance.Copyright
© 2016 by Regents of the University of Colorado; original © 2015 University of California DavisContributors
Duff Harrold; Michael Mullen; Sara PaceSupporting Program
RESOURCE GK-12 Program, College of Engineering, University of California DavisAcknowledgements
The contents of this digital library curriculum were developed by the Renewable Energy Systems Opportunity for Unified Research Collaboration and Education (RESOURCE) project in the College of Engineering under National Science Foundation GK-12 grant no. DGE 0948021. However, these contents do not necessarily represent the policies of the National Science Foundation, and you should not assume endorsement by the federal government.
Many thanks to RESOURCE fellows Travis Smith and Eric Anderson, and Matsuyama Elementary School sixth-grade MESA students Bobby Horst and Godebo Chapman.
Last modified: September 10, 2021
-
Latest
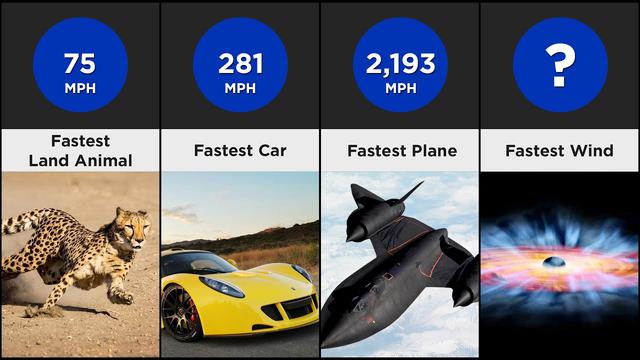 What is the fastest thing in the universe? | InetResource.net
Is life only on earth?Earth is the only inner planet in our solar system that has liquid water on its surface. Seventy percent of the surface is covered by oceans where photosynthesis takes place. Thi...
-
Next
 What is The Fastest Thing in The Universe Apart From Light ...
The Fastest Thing in The UniverseLight isn’t an object, light is radiation at intervals a certain portion of the spectrum. Apart from light, a number of the fastest thing in the universe are “plasma...
Popular Articles
- Rocket Power (TV Series 1999–2004) - Rocket Power (TV Series ...
- technique - What is the definition of 'playing in the pocket ...
- "Pocket rockets," in poker Crossword Clue Answers, Crossword ...
- 5 Sex Toys Every Man Should Own, Use & Use Again - LA Weekly
- Pocket Holsters: 11 Options For Easy Everyday Carry (2021 ...
- What is Elton John's most successful song? (Celebrity Exclusive)