Water Bottle Rockets
Introduction: Water Bottle Rockets
These instructions detail the steps involved in building a water bottle rocket. These rockets use pressurized air and water to fly hundreds of feet in the air, and make a great science project for use at home or in the classroom. This rocket project is suitable for ages 8 and up with adult supervision, and should take less than 20 minutes to build. WARNINGS * Never launch your rocket in a busy area, an empty field is a good place. * Never attempt to retrieve a rocket which has landed in power lines or in another dangerous situation. * Never launch your rocket in any direction but straight up. * Never over pressurize your rocket, follow the pressurization instructions of your launcher. * The writers of these instructions assume no liability for your safety, please use common sense and caution when launching a rocket.
Step 1: Materials and Tools for Instructions
All of these materials can be found at your local department or office supply store. Materials for Construction * 1 liter plastic bottle * 2 manila file folders * 1 roll of clear packaging tape * 1 rocket printout, found in Step 3Tools for Construction * scissors--WARNING never use scissors without adult supervision. * marker * a microwave or stove to heat water--WARNING never use kitchen appliances without adult supervision. Never leave your stove or microwave unattended while running. Use caution when handling hot water.

Step 2: Prepare the Bottle
Part A: Empty the 1 liter plastic bottle of its contents. You can do this by drinking the contents or emptying it out in a sink.Part B: Peel the label of the bottle. If pealing the label is difficult, fill the bottle with hot but not boiling water. Allow to stand for three minutes, then peel off the label. Drain the water and allow the bottle to cool.
Step 3: Print Out the Template
Either1.Download the template below (Rocket_Template.pdf) and print it out.Or1. Right click the "I" in the upper right hand corner and choose "Open in New Tab"2. In the box on the left, choose "Original ImageClick here instead3.Right click on the image and choose "Save Image As".4. Open the image on your computer and print landscape on 8.5x11 (Letter) size paper.
Step 4: Make the Fins and Nose Cone
I you wish to decorate your fins and nose cone, be sure to do so after tracing them. Part A: Cut out the fins and nose cone templates from the printout. Cut along the solid lines only.Part B: Trace the fins on the first manila folder. Be sure to line up the fins with the fold on the folder, the fins should be double sided.Part C: Trace the nose cone on the first manila folder. Be sure to mark the overlap area and the slits on the nose cone.Part D: Trace the third fin on the second folder, again lined up with the fold. You can reuse one of the other fin cut-outs.Part E : Cut out the fins and nose cone from the folders. Cut the slits on the nose cone. Do not cut the fins in half, they should be double sided.
Step 5: Form the Nose Cone
Part A: Crinkle the tip of the nose cone.Part B: Roll the nose cone and overlap the bottom edges. Part C: Slide the tip to completely cover the overlap area. Cutting a little off the tip may help.Part D:Tape both the inside and outside to help the nose cone hold its shape.
Step 6: Attach Nose Cone to Bottle
Be sure to tape the nose cone on the end of the bottle WITHOUT the cap.Part A:Place the nose cone over the end of the bottle without the cap.Part B:Tape every other tap to the bottle.Part C:Tape the remaining tabs down with one piece of tape. Feel free to use as much tap as you want.
Step 7: Tape the Fins to the Bottle
The fins will be 120 degrees apart and have an inch of separation between the two sides of each fin.Part A:Lay a fin out flat.Part B: Apply tape to one side of the fin.Part C:Align the edge of the fin with the bottle and set the tape.Part D: Apply tape to the other side of the fin.Part E: Fold the fin along its crease and set the tape. *The bottom of the fin should be spaced about an inch apart.Part F: Repeat each step for the other fins.
Step 8: Fly Your Rocket
Ready to fly! Check out these links on how to build a launcher!
Be the First to ShareRecommendations
Metal Contest
Tinkercad Student Design Contest
Make it Move Challenge
-
Latest
 How to Draw Pearl (Steven Universe) VIDEO & Step-by-Step Pictures
Page 1 of 4Use the step-by-step drawing instructions below to learn how to draw Pearl from Steven Universe. Stay tooned for more tutorials!Stay tooned for more free drawing lessons by:All of the free...
-
Next
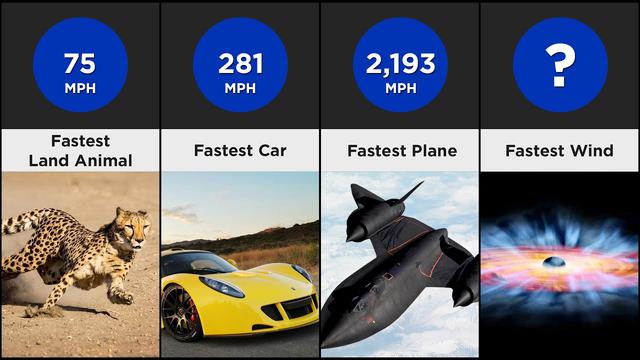 What is the fastest thing in the universe? | InetResource.net
Is life only on earth?Earth is the only inner planet in our solar system that has liquid water on its surface. Seventy percent of the surface is covered by oceans where photosynthesis takes place. Thi...
Popular Articles
- Rocket Power (TV Series 1999–2004) - Rocket Power (TV Series ...
- technique - What is the definition of 'playing in the pocket ...
- "Pocket rockets," in poker Crossword Clue Answers, Crossword ...
- 5 Sex Toys Every Man Should Own, Use & Use Again - LA Weekly
- Pocket Holsters: 11 Options For Easy Everyday Carry (2021 ...
- What is Elton John's most successful song? (Celebrity Exclusive)